Saturday, March 3, 2012

Gorgonzola Filled Balsamic Burgers!

Hey everybody! Today, I decided to do a post on a classic American dish with a little bit of an upscale flare to it. I wanted to make cheeseburgers and fries, but with more distinct, and not-so-common flavors. I settled on gorgonzola stuffed burgers, with caramelized onions and a balsamic reduction. The flavors really go well together, especially with the sharpness of the gorgonzola and the balsamic vinegar, with the sweet, smooth flavor of the caramelized onions. It's really a great dish and I hope you try it!
First, you want to start by seasoning your ground beef. I added paprika, garlic powder, onion powder, some fresh parsley and a little bit of cayenne pepper.
Next, you're going to want to find yourself a small block of gorgonzola cheese.
Get about half of the amount you would use for the size of a burger, and fill it with some crumbles of the gorgonzola. Then, you're going to want to take the other half amount of seasoned meat, and put it on top, and seal the sides shut. This way, when we grill it, it will be nice, juicy, seasoned beef with fresh gorgonzola oozing out of the center. It will be great, and look great, too!
Next, you want to just melt about a tablespoon or so of butter in a pan.
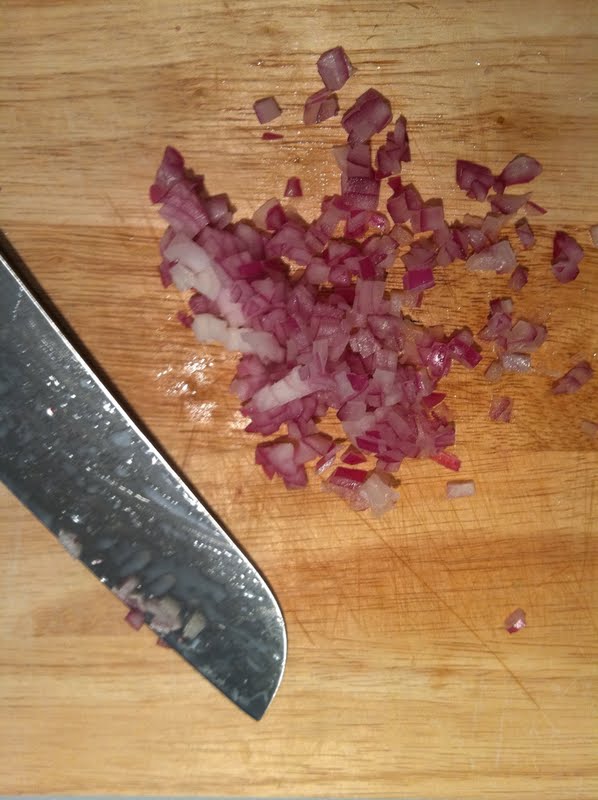
Then, you want to add the onions to the melted butter. I used vidalia onions because I find they offer the most in the sweet department. The best way to achieve caramelized onions is low and slow; meaning you keep the heat low, and take the extra time to cook the onions. You want there to be stages. The first stage is for the to become translucent, then they start to brown. However, its not spots of brown but an overall, uniform brown tone to the pan. This happens because the natural sugars are coming out and being cooked. 
They should look something like this when they're done.

Now, onto the balsamic reduction. This is so simple, and adds a great touch to the plating presentation, as well as the flavor profile of the burger. All you have to do it pour the balsamic vinegar into a pot, or a shallow saucepan, and let it lightly simmer until it thickens. Essentially, you are waiting for the extra liquids to evaporate, and you get a reduced, thickened sauce with a more powerful flavor. 
Once you see a little bit of froth on top like you can see in the picture above, its all done and take it off the heat immediately before it over cooks. 
I put the reduction into this little beginners cake decorator my Mom got me when I was about 10 and first started actually piping onto cakes. I kept it in my section of the kitchen, and it came in handy with this dish for plating purposes. 
The next step is to grill the burgers, and toast the buns. Sometimes I opt out of toasting buns on regular burgers because I think if the bun is so fresh, that toasting it is taking away some of the characteristics that attract you to fresh bread- but hey, to each his own. Thats another post. I think toasted buns go great on this dish because they add a little bit of a crispiness, therefore adding a lot to the dish texturally. 
I decided to also serve this with some dill potato wedges. I just tossed them in some extra virgin olive oil and fresh dill and baked them until they were soft on the inside and crispy on the outside-too easy!
For plating, you want to take a toasted bun, put one of the patties on top of it, and top it with a little bit of the balsamic reduction, and some caramelized onions. I also put a couple drops of the balsamic reduction on the side of the plate for looks. I really liked this dish and definitely recommend that you try it. If you do, let me know how you like it!

Mini Strawberry Cheesecakes!

Hello everybody! Today I have an extremely simple, yet delicious dessert that I thought of randomly one day and bit the bullet and tried it out. I made this for a family party and intended for them to be a dessert. They were a big hit, and were all gone before it was time to eat the actual meal! That being said, apparently they work great for a brunch type get together or dessert! 
First, I made a very simple cheesecake type filling. I didn't want to have to bake it though, since they'd obviously be filling fruit. I decided to just sweeten some cream cheese and see what happened. I used one 8oz package of cream cheese, and about 3 tablespoons of confectionary sugar. I stirred this is my Kitchen-Aid stand mixer with the paddle attachment until it was all bound together. 3 tablespoons makes it sweet, so if you'd like it to be more tart, and cream cheese-ish, like an authentic cheesecake, I'd say only add 2 tablespoons of sugar. You can also add about a teaspoon of lemon zest at this point if you'd like.
Next, you want to cut the tops off of your strawberries, and take out the middles. I used a paper towel to dry out the inside after I had made the hole just to make sure that the inside was dry. This ensured that the cream cheese filling would adhere rather than just sliding out.
Next, I put the cream cheese filling into a piping bag and piped it into the middles of all the strawberries until they were filled just a little bit over the top. They should look something like the picture above.
Then, I took some graham cracker crumbs, and just dipped the strawberry tops in them. This gives the strawberries more of an authentic cheesecake-type look and taste. They also add a nice little crunch texturally.
They should look like the picture above when you're all done. These strawberries are extremely easy to make, and are delicious. I absolutely recommend that you try them, and if you do, let me know how you liked them!

Until Next Time,
K

Wednesday, October 19, 2011

Chicken Pockets!

Hey everybody! Long time no talk! I've missed you all, but I've been beyond consumed with school. I seem to be getting into more of a set schedule now, though, so I can start to figure out times to write these posts. Anyways, today's post is on a dish I just kind of put together one day when I was trying to think of good freezer meals besides soups...I thought these chicken pockets were a good option.

First, you want to start out by cooking a chicken. You can buy the pre-cooked roasted ones if you'd like. However, I was making a few dishes with chicken on this same day so I just got a full chicken and broke it up as I needed it for each day. 

It should look something like this when you're done cooking it. Remember to keep basting it as you are cooking it in order to ensure that it stays moist and develops a golden brown color on the outside.

While your chicken is in the oven, start sauteing your carrots, onion and celery. This will be used as the filling for the pockets.

Once your chickens cooked, shred it up and add it to the celery, onion, and carrot mixture. Cook this on low heat for about 5 minutes so that the flavors can meld together a little bit.

Lay out a piece of puff pastry, and scoop about a cup, to a cup and a half of the chicken and vegetable mixture on one side of the puff pastry, and fold it in half.

Then, you want to make an egg wash by mixing together some egg yolks and milk. Brush this on top of the pockets and bake at 350 degrees until the puff pastry is cooked, and the inside is heated thoroughly. 

They should look something like the above when they're done.

Now, you want to take the drippings from the chicken, and put it in a small saucepan. Heat until it starts to simmer.

Mix together about a tablespoon of flour, a tablespoon of cornstarch, and 2 tablespoons of colder water. This will be our thickening agent since you don't want the gravy to be too thick.

Once the drippings start to simmer, whisk in the cornstarch mixture and keep whisking until it starts to thicken. It should take about five to ten minutes for it to really come together.

Once you are done, it should look something like the picture above. You can serve these with mashed potatoes, or rice, or serve them alone. I definitely recommend trying out this recipe, and if you do, let me know how you liked it in the comments below! :)

Until next time,
K

Saturday, September 3, 2011

talk to me!

Its come to my attention that a lot of people have been trying to leave me comments and they haven't gone through. Quick rule of thumb, if you look at the bottom of the post that you tried to comment on, and click where it says "0 comments" or however many there are, and yours is not there, try doing it again. I had to take a security setting off of my blog in order to simplify the posting for readers. SO, heres how to post a comment:

1. On the post you'd like to comment on, scroll down to the bottom of that post and click where it says "0 comments" (or however many there are on that post the number may vary)

2. A small, white box will come up which is where you are going to write your comment.  Click on the box so that you are able to type in it, and then type whatever you'd like in that box.

3. Once you've typed what you'd like to post, below the white box there is a drop down menu that reads "comment as" if you do not have an account on blogger, or any of the other options listed there, or if you just would like to stay anonymous, choose anonymous way down at the bottom of the menu.

4. After you've chosen what you'd like to comment under, simply hit "post comment" right below the drop down menu that now says anonymous.

On the old security setup, there used to be another step at the point. However, now, you should be able to just get a message saying that your comment has been posted, and then it will have been sent to me.

Sorry for the confusion as i know a lot of you have tried leaving me comments and I'm finding out now that they didn't go through. If you'd like to post it again, however, I'd love to hear what you had to say!
Thanks for all of your patience and I hope this slight change simplifies things a little bit.

I have a lot of great dishes coming up soon, so keep checking back for updates!

Until next time,
K

Wednesday, August 17, 2011

Summer Bruschetta!

 Hey Everybody! Today I’m going to be showing you how I make a delicious bruschetta. I created this dish about three years ago and it has been a staple at every family party since. It’s especially great in the summer when all of the vegetables used are in season. However, it works well all year too! The awesome thing about this is that you can either serve it as a hors d'oeuvre type thing, with a grilled chicken breast, or even some type of dinner as a side dish. So, lets get started!

First, you want to thinly slice a loaf of French bread. I chose this type of bread because it has a specific type of crust, which allows it to toast very nicely.  It works especially well if you buy the loaf of bread the day before, that way it is a little bit stale, which makes cutting it much easier for you. However, it works just fine if you buy it the day of too.

After you’ve sliced all of the bread, arrange them on a cookie sheet, as shown above, and brush them with a little bit of oil: this will help them become crispier. After you have lightly coated all of the slices in oil, put them in the oven at 350 degrees until they feel crispy to the touch.

While your bread is in the oven, thinly slice some zucchini (as shown above.) I find that for one loaf of French bread, two zucchinis seem to be enough. Toss them in a pan with a little bit of butter or oil, whichever you like, and sauté until they are cooked. You can tell when they are cooked because they will become slightly translucent and flimsy.

Do the same thing with summer squash. I find, again, that two of them is just enough for one loaf of bread.  

 Then, while your bread is toasting and your squashes are sautéing, thinly slice up some Roma tomatoes. I usually use about four to six, depending on the size.

 
Next, chop up some basil. I used about 6 large leaves and finely chop them. Don’t forget to keep an eye on your bread and squash at this point. Keep occasionally stirring your sautéing vegetables, and check on the bread every once in a while too. 

Once your bread has toasted and your vegetables are all cooked thoroughly, it is time to assemble. First, you want to take a slice of toasted bread, and lay a slice of your tomato on top. Then, a slice of summer squash, and on top of that, a slice of zucchini. Then, garnish the top of the bruschetta by sprinkling a few pieces of the chopped up basil on top.

To finish it off, add a few pieces of shredded mozzarella cheese. Once you have completed assembling all of the pieces, put them back into the oven: just long enough so that the cheese melts and everything heats back up again. This also helps the flavors meld together a little bit more.


 Once they come out of the oven, they should look something like the picture above. I definitely recommend trying this out, as it can be used for many things and is a very aesthetically appealing dish. You are sure to impress people with this one! Enjoy!


Until Next Time, 
Kristen

Monday, August 15, 2011

Jalapeno poppers!

Hey everybody! Just a quick post for today. However, nonetheless delicious. Jalapeno poppers have become a staple hors d'oeuvre in our house whether we are having company over or not. They are very versatile as they work great for everything from tailgating to higher class dinner parties. They truly are pleasing to the palate because first, you get the crunch and sweetness of the grilled bacon, but then gooeyness of the melted cream cheese, and then finally the palate is washed over with a light heat from the jalapeno. However, the heat is not too much because the cream cheese is there to balance it out. I definitely recommend trying it out!

First, you want to start by halving jalapeno peppers. If you see in the picture above, the white, or light green part of the pepper that the seeds are held on by is called the membrane. It is a common misconception that the heat from peppers is all in the seeds. However, although the seeds do contain a minimal amount of capsaicin, the chemical that makes peppers hot, the membrane actually has higher levels of capsaicin than the seeds do. Therefore, you are able to control how much heat you want the pepper to have by regulating how much of the membrane you remove.

Next, scoop out the seeds and membrane of the pepper. I usually take out as much of the membrane as I can, as there are still some traces of capsaicin in the pepper's flesh, in order to avoid overpowering the popper with heat. However, if you can handle and enjoy the heat, go for it. Go big or go home, I suppose!

After you're removed the insides of the pepper, fill it with cream cheese. There are many variations of cream cheese on the market, such as chive, onion, etc. Choose one of those if you'd like. I, however, like to stick with the classics and change up my bacon preference. 

Next, you want to select the bacon that you are going to use. Do not use the kind that comes basically pre-cooked that you just heat up in the microwave. It will cook far too fast on the grill, and you wont get the right texture. I chose to use maple bacon, because, as my brother says, "Even vegetarians like maple bacon." 

After you've chosen what type of bacon you want to use, wrap your cream cheese stuffed jalapeno in it and secure it with a toothpick like shown above.

Next, just toss them on the grill and turn them over once until the bacon is cooked. It should look something like the above. Definitely try this recipe out and let me know how you like it!

Until next time, 
K

Saturday, August 13, 2011

Fish Tacos!

ayooooooo! Im back, and with a fabulous summer recipe; not that it couldn't work all year long too :) Today we're going to be making fish tacos with a mango relish, and a chile verde sauce. I know it sounds like a lot, but take a deep breath because really, its not as hard as it sounds at all. It will however, take about an hour to get it all done since there is a lot of cutting and you'll have to roast the peppers before making the sauce. However, if you prepare everything the night before, and just cook the fish the day you want to have the dish, this could potentially be a great meal to have after a day at work. Okay, enough talking, lets get going!

First, you want to wash your peppers, I chose anaheim peppers, which is a member of the chile verde family. I charred them in the oven at, I believe, 350 until they turn black on the outside. Then, you want to toss them all into a paper bag for a minute or so in order to steam them. This will all make the process of removing their skin easier. It will also soften them which will help make the meat of the pepper softer, so it's easier to make into a sauce.

Once they have been charred, you want to remove the skins, stems, and seeds. They should look something like the above picture once you've done this.

This is going to be the mixing agent that we'll be combining with the peppers. This will be perfect because, although these peppers aren't anything near as hot as some of the other varieties out there, they still have some heat to them. This will help balance it out giving you the flavor of the pepper, without overpowering the palate with heat to the point where you don't get the awesome flavor of the pepper.

Blend the peppers up at fine as possible, then add a dollop or two of sour cream as you go. You don't want it to be too creamy so make sure you add it in small amounts as you go. Then, I added some fresh scallions, parsley, and cilantro in order to make the flavors a little bit more complex. This will also help the after taste be more than just heat, but rather flavor with some heat.

Once you're done it should look something like the above picture.

Now, time for the relish! Your knife skills will be impeccable by the time you're done with this dish. First, dice up a red onion. Remember to use the trick I taught you in the pizza entry's onion video in order to save time. See, its all full circle now ;)

Next, chop up some mango. What do you know, theres also a video for how to cut a mango on the pizza entry. I couldn't have planned for it to work out this well :)

Then, chop up 2 avocados. A tip for avocados, in order to prevent them from oxidizing, or turning brown, if you're only going to use half of it. In order to preserve the remaining half, keep the pit in there and drizzle it with a little bit of lemon or lime juice. The pit physically prevents it from oxidizing, while the acidic juices freeze the actual enzymes that oxidize.

Next, dice up some red bell pepper.

Now, you guessed it, chop up some tomato.

Next, add the juice of one lime to the bowl. 

Add some fresh chopped parsley, too. I also added a can of black beans figuring it would add to the southwestern type flare we have going on here. I have never added them before but it was nice to have a textural change in there, as well as to add some protein.

I also peeled a lime and took out some of the pulp and added it to the bowl. A quick tip; if you can see on the right hand side of the lime, there is a thin white, almost paper looking thing that separates the slices. That is the membrane of the lime and it has two layers. If you cut so that the membrane is attached to the piece of lime, the amount of juice you'll get out if that slice is going to be decreased immensely. Therefore, cut around it.

It should look something like this once its all been stirred together.

Also shred some cabbage up. This takes the place of lettuce in a typical mexican taco.

Now, onto the fish. I chose to use tilapia because it is a firm white fish, which comes in handy when you're cooking for this dish. Although you will be cutting it into chunks after its cooked, its just easier to be in control of the size rather than having it fall apart on you and become shredded. You can find tilapia at any basic fish market, as well as the fish counter at your local grocery store. Season the filets with salt and pepper on both sides.

I decided to grill mine, but put a piece of aluminum foil on the grates of the grill in order to avoid direct heat to the filets. Flip over half way through the cooking process. You'll know that they're done when you can stick a fork in the filet and it flakes.

Then, just cut the filets into chunks. 

Now, assemble the taco and you are finished! Layer it fish, then relish, a little bit of shredded cabbage, and some chile sauce. You can also add a little bit of shredded cheese, which adds a nice touch. Definitely try this recipe and let me know how you like it in the comments below!

Until next time, 
K