Thursday, March 31, 2011

Good Lookin' Taters!

This weekend for a family party, I decided to make some potato salad. In my grandfathers words, "Holy tollido this is good!" A simple dish, but when you add out of the ordinary ingredients, its becomes extraordinary. I've added some flavors that would usually not work well, but when contrasted with the basic, and somewhat bland flavor of potatoes, the flavors combine to form a great dish.

First, you want to cut up some potatoes, and boil them until a fork can be inserted into them an removed without any difficulty. This is to check the tenderness of the potatoes and make sure they're done.

Next, you want to set aside a few of the potatoes. I would say for every 10 cubes, remove 2. Dont worry about being too exact. A couple extra or a couple less is no big deal.

Then, you want to take the back of a fork and crush the potatoes up until they are about the texture of mashed potatoes.

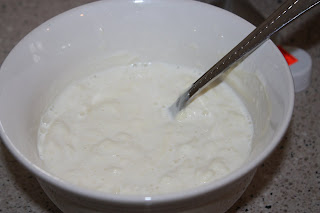
Next, mix together a ratio of 2:1 mayonnaise and vinegar. To be quite honest, this is going to look pretty repulsive until its all mixed together. Keep stirring until it beomes smooth and white. 

Pour the smashed up potatoes into the bowl, along with the vingear and mayonnaise mixture. Start folding it until its all mixed together. A silicon spatula may be your best bet over a spoon. Be prepared that it's going to sounds pretty wierd as it all smushes together. Dont worry, just think of it as an adult's rice krispie cereal when you first pour the milk into the bowl.....kind of.  ish. snap crackle pop?...

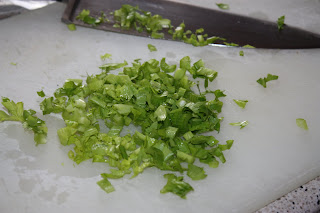
Chop up some celery. I used about 3 stalks, and then one stalk of the heart. Add the celery to the bowl and mix it all up.

Now comes the time for the odd ingredients. Add a few tablespoons of relish. I used about 3.

Then, do the same with some dijon mustard. I used about 2 tablespoons of this.

Add some chives as well, and then mix it all together. I didn't really measure the chives, I just sprinkled some over the top and mixed it together. So, when people like Mike say, "How do you know how much to use?" Just sprinkle a little on top and mix it in. Put it into the bowl you'd like to serve it in, and sprinkle a little bit of paprika on top. It should look something like the first picture. However, if it doesnt, I suggest trying a little bit before you serve it to other people...

If you try it, let me know how you liked it in the comments!


Until next time,
K


Serve with:
-anything really, potato salad is a very versatile side dish. However, it is most widely known for being used as a side dish to go along with some type of barbeque or grilled food. 


NONCOOKS LIFELINE:

Celery Hearts- The heart is the part that is in the middle that have smaller stalks, and they are less green and more yellow a lot of the time. They are the pieces with all of the leaves on them. The hearts of celery have a much more concentrated flavor than the outside stalks.

Monday, March 28, 2011

Saucy Seared Scallops


I decided to post a more gourmet dish tonight, I hope you like it. I decided on pan seared scallops on a bed of arugula, garnished with diced beefsteak tomatoes with a crostini type bread, and a pistachio and cilantro sauce. Also there has been some confusion about whether or not these pictures are actually mine, and whether the final result is a plate I actually made, or whether I've pulled it off of a website from a recipe. I rarely use recipes while cooking, and havent yet on anything on this blog. However, if I ever do, I'll state it in the entry. I do, in fact, take all of the pictures on my blog as I'm making the dish, and the picture at the top of the post is the actual result that I made. Anyways, although this dish is a little more gourmet than some of my past posts, I'm pretty sure that if you follow the steps you'll be able to pull it off.

First, you want to take the shell off of about 1/4 of a cup of pistachios.

Run a rough chop through them after you have taken the shell off. This will help make it easier when we blend it. 

Then, you want to spread them out on a cookie sheet and bake them at 400 degrees for about  5 to 10 minutes until they turn a slight golden brown. The reason we are roasting these is so that when we make a sauce out of them later, the flavor will be deeper, as well as richer.

After they are done cooking, they should look something like this. 

Toss the toasted pistachios into a blender, and pulse it until they are all cut up into very small bits. 

Next, run your knife through about 3/4 or a cup of fresh cilantro. Unfortunately, you cant use dried for this dish since the natural oils from the cilantro will help meld the parts of the sauce together. Then, run your knife through some fresh mint. You'll need about half the amount of cilantro that you used. Then, do the same with some parsley. You'll need about the same amount of parsley that you used of mint. 

Take the juice of one fresh lime, and squeeze that right into the blender. You'll only need about a tablespoon or two, don't measure it perfectly, eyeballing the amount will suffice. Also add a pinch of dry mustard as well as cayenne pepper. 

Add a few dollops of sour cream and 4 ice cubes and blend it together until smooth. It should look something like the above. The ice cubes are also beneficial since we're using sourcream, if you make this ahead of time, while you cook the rest of the meal it won't reach room temperature until you plate it. Don't be concerned if there are some little dots in there like you can see in the image above. It's because we're mixing solids with liquids and you can't make an emulsion out of these ingredients, but that's another day's post. 

Next, you want to have a nice loaf of bread. It should be crusty on the outsite but still soft on the inside. A way to test this would be to just press lightly on the loaf, and the amount of pressure that it yields to tells you how crusty it is. A good option for this step would be focaccia bread, however my bakery had just taken these out of the oven and they looked perfect so I bought this instead.

Cut the bread into slices like this, make sure they aren't too big because will need to be able to balance on a pile, and be proportionate to the rest of the dish.

Cut a pad of butter for each slice of bread that you have just cut. Melt it until it gets small bubbles in it like pictured above. Place the bread, side down, and brown it until it's golden brown, tuen it over, and do the same to the other side.

It should brown up to look something like this. Make sure that your butter pads aren't too thick, or else the bread will become saturated and it wont crisp up into the typical crostini texture.

Once again, melt a few pads of butter, this time in a nonstick pan. Make sure it's a nonstick because scallops are so delicate, that when we sear it, if it sticks to the pan, it will tear and you wont be able to use it.

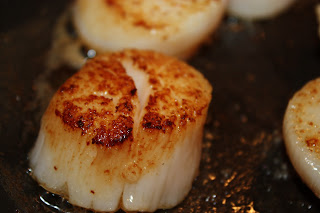
Arrange your scallops in a pan like this. If you have to do it in batches, then do that. Make sure that the scallops have room to breathe, meaning that they aren't touching. This is very important, especially when searing. 

When the bottom of the scallop has browned to a point somewhat like this, flip it over until the other side looks like this. Try not to move them around too much, once again, because they are so delicate. If you have the temperature just right, you should only have to flip it once and both sides should be evenly cooked and browned.

Set them aside and work on your next batch.

Plate the food however you want, I chose to put the scallops on a bed of arugula with a garnish of diced tomatoes, with the sauce on the side of the plate. If you try it, let me know how you like it in the comments!

Until next time, 
K

NONCOOKS LIFELINE:

Seared- see previous post, braised short ribs
Crostini- a type of bread sliced thin, then toasted.
Rough chop- a cut when you just run your knife over something, not too particular, just to break it down into some smaller pieces.
Pulse- to pulse something in a blender is when, rather than holding the button down continuously, you press it repeatedly until the food reaches the desired size or texture.
Focaccia bread- a flat, crusty, oven baked italian bread.

Sunday, March 27, 2011

Sizzlin' Stir-Fry


A March Saturday night and its cold, dark, and windy out. At this point, I am definitely not wanting to go outside and grill steak tips like I had originally planned. So now I have two pounds of defrosted sirloin tips sitting in front of me, and rather than venture out into Antarctica, I decide to take my cooking endeavors to the indoors. We have a lot of fresh vegetables, so the first thing that comes to my mind is a stir-fry. I looked to see what I could use as the sauce, and decided to make it up as I went along. Stir-fry's are a great option when you have a lot of food, and aren't sure what to do with it. Thus, the dish pictured above happened. Try it out, and feel free to add your own changes, depending on which type of vegetable or meat you have available to you. 

First, I sliced the meat into uniform pieces. A large julienne, almost, and cooked it on medium heat, seasoned with sea salt and pepper. Wait until all the pieces of meat are browned, and appear to be cooked, but dont wait too long since the meat will finish its cooking in the sauce after it has rested. 

After the meat has browned, drain it and set it aside to let it rest. 

In the same large saucepan that you cooked the meat in, add some beef broth, Worcestershire Sauce, soy sauce, and browning sauce. 

Whisk the ingredients together and simmer. I used about 2 and a half cups of beef broth, about a quarter of a cup of Worcestershire Sauce, 4 tablespoons of soy sauce, and about 2 tablespoons of browning sauce. I didn't measure these out since I was making the dish up as I went, so this is just a rough estimate. Feel free to add or take away a little depending on how you'd like it.

This is sort of between a light boil and a simmer. Bring the liquid up to this stage and let it simmer for about 10 minutes. 

Add the beef back in and let it cook together for about 5 minutes. This will be just enough time to let the meat marinate, but still keep some of its natural flavors. Since the sauce will be served with the dish, you don't want to over marinate the meat to the point where it tastes like a textured version of the sauce.

Next, add in whatever vegetables you'd like. I chose broccoli, and a medley of corn, green beans, carrots, and peas. If you'd like, you can add frozen vegetables as well right now. Keep in mind, however, that they will take less time to cook since they are already semi-cooked and then flash frozen before being packaged. 

Serve over a bed of rice, garnish with sesame seeds, and you're good to go. 


*Note: Just be sure that if you are going to substitute chicken for the beef, you use a chicken stock in substitution for the beef stock.


Until next time,
K

NONCOOKS LIFELINE:

Julienne- a type of cut, usually used on a vegetable, where it is cut into thin strips. However, on the meat, we did a more thick one. 

Simmer- see previous post on homemade pizza rolls.

Marinate- to literally soak a piece of meat in a sauce to infuse it with flavor, usually before cooking, but we did it during cooking in this recipe. 

Garnish- to garnish is to top a dish with another type of food, usually an herb, to embellish it.

It's A Nice Day For A Dip!


I don't know about you, but where I live, we've had one crazy winter. Whether it be the eight foot snowbanks, having a snowday at least once a week, or the -7 wind chills, I'm pretty sure everyone is craving spring and summer at this point. I, for one, am looking forward to the fresh fruit and vegetables that are finally going to be in season, and not mushy or unripened. However, after a while, slices of fruit can become pretty redundant, and I'm sure you'll be looking for a change while still using all of the fresh produce available to you before the snowbanks return. A great idea to spice up your fruit is to have a dip with it. I've created this dip recipe in hopes of spicing up fruit trays around the world with a blend of creaminess, yet sweetness, while still not overpowering the natural flavors of the fruit.

First, you want to slice up about one stick of butter, give or take a little depending on how many people you are planning to serve. I formulated mine so that it would serve as a hors d'oeuvres for about 20 people. We are slicing the butter into pads so that they have an even cooking time. If we were to just toss a stick of butter into a hot pot, the chances are that while the rest of the stick was melting, what had already melted would burn and you would have to start from scratch again.

Once all of your butter has melted, you want to add brown sugar. Make sure the heat is on low so you don't burn the sugars before they caramelize. I added about a cup of packed, which is equivalent to about a cup and a half of unpacked. We're only using a cup because if you put too much in, itll become very sweet which will in turn make the fruit taste sour. The goal of this recipe is to enhance hte flavors of the fruit, not overpower them. Whisk the two together. 

After you're done whisking, the sugar and butter mixture should look something like the above. You shouldn't be able to see any sugar granules, and the sugar shouldnt separate from the butter if you let it sit for a moment. If this does happen, and they do separate, return the mixture to the low heat and whisk for another minute or so. The sugars just need to carmelize a little bit more and you should be good. Let the mixture cool down until it reaches room temperature. Do not rush this step, let it cool fully.

While waiting for the sugar and butter mixture to cool, mix together some sour cream and vanilla. I did about a 1:1 cup to tablespoon ratio, meaning that since I used about a cup of sour cream, I added a tablespoon of vanilla. This ratio makes it easier so that if you decided to double, or split the recipe, it makes it easier for you. Don't worry if your measurements aren't exact. The reason that you need to make sure that your sugar and butter mixture is because we're using sour cream. Since its a cream based food, it could scald if it gets too much heat exposure.

Once its all cooled, add the sour cream and vanilla mixture to the sugar and butter mixture. Whisk together until its smooth and all a uniform color.

It should look something like this.

Pour it into your serving dish and you're good to go!

Until next time, 
K

NONCOOKS LIFELINE:

Hors d'oeuvres- pronounced orderve, this is a small food eaten before a meal, but not served before it. Hors d’evours and appetizers are commonly interchanged, but differ becuase of this. An appetizer is part of the meal that is served first. On the other hand, an hors d’evours has not correlation to the meal, it is just meant to fill the person eating while the meal is being prepared.
Pads of butter- when you cut butter into pads, you cut it about a centimeter thick  horizontally, so that it forms uniform sized squares.
Caramelize- when sugars melt down form their granulated state. 
Scald- when you heat a milk or cream based substance so much so that it actually burns and becomes extremely bitter or dry depending on whether its a liquid or a solid. ie. milk, or chocolate.


Saturday, March 26, 2011

TotiNO More Frozen Pizza Rolls!


This friday, my brother and I treked out and took the long awaited journey to go purchase a fryolator. Well, he purchased it, I was just a co-pilot on the way there and picked out which one I wanted. On the ride home, we were brainstorming everything we could make. Well, rather, everything I could make for him while he sat and talked with me. Seeing as he has the diet of a 4 year old, we thought homemade pizza rolls would be good place to start. I've never made these before, nor have I ever heard of making homemade ones, so I kind of made it up as I went along. So, if any of you know someone who eats like theyre 5, or even if you just want a cool snack, different from what you usually have, I definitely suggest these. They work great as an appetizer, too!

First, you want to start by making your sauce. You can buy pre made pizza sauce if you'd like, but I opted to make my own. I only needed a little bit so I bought a can of crushed tomatoes and went from there. I cooked it in a small sauce pan, bringing it to a light boil, then reducing the heat to low and letting it simmer. I really seasoned it with garlic, oregano, parsley, etc. while it was cooking and eventually, we were good to go. 

Next, I began to work on the dough. I had some dough left over from homemade pizza that I had made a few weeks ago and frozen, so I just defrosted that. After kneeding it on a floured surface, I formed it into a ball. If you want your pizza rolls to be less doughy and more sauce and cheese based, you can use wonton wrappers instead of dough...they can be prepared the exact same way. 

I then cut small chunks from the ball, and thinned them out to about a half or a quarter of a centimeter thick, then cut them into squares. Its okay if the edges are a little bit thicker, because they will end up being cut off anyways.

After my sauce had cooled down a little big, I mixed together equal amounts of shredded mozarella and the sauce. Once it's all mixed up, scoop about 2 or 3 tablespoons of this cheese mixture into the middle of your dough square. Fold one corner over the opposite side's corner, and then repeat on the other side. and if you do it correctly, the pizza roll look somewhat like a teardrop shape. Trim off any unnecessary left over flaps of dough Poke a hole somewhere in the roll to avoid getting bubbles when you fry it.

Crack one egg and whisk it together. Then, brush this eggwash lightly onto all sides of the pizza roll. This will help prepare the roll for the next step.

Cover your pizza roll on all sides with bread crumbs. This is where the teardrop shape comes into play. You can now sit it up, larger side down, and cover the bottom, then just roll it across your plate and cover the entire roll. The eggwash from the previous step helps the bread crumbs adhere to the dough.

Fry the pizza roll in oil thats somewhere around 390 degrees until its golden brown on all sides. I chose to use canola oil, but you can use whatever your favorite cooking oil is... just a warning, not all oil is okay for frying. You need to make sure it doesn't have a low smoke point so that it doesnt cause a fire. 

Pull it out of the fryer and it should look something like the picture above. Don't worry if a little bit of sauce or cheese ozzes out of the roll, its just further confirmation that the roll is cooked through. 


Until next time,
K

NON-COOKS LIFELINE:

Light boil- as opposed to a rolling boil, a light boil is when the substance is just slightly bubbling, and the entire top is not covered in bubbles like when you think of boiling water. The bubbles are equal distances apart, but not rapid.

Simmer- when the food is just hot enough to create small bubbles, the heat point of food before boiling.

eggwash- when a  egg is whisked toghether and then applied, usually by being brushed on or dipped, to a food. It is used to adhere things such as flour, batter, or any other type of coating.

Smoke point- a smoke point refers to the temperature at which oil cannot physically be heated any more without breaking down to glycerol and fatty free acids. Some oil starts to turn a bluish color at this point. The smoke released if you get an oil up to, or past its smoke point can be extremely harmful to your eyes and throat. You should always check an oils smoke point before frying with it. For instance, canola oil's smoke point is either 400 or 475, depending on whether the oil has been refined or not. However, since I knew that I would be staying around 350 to 390 degrees to fry these pizza rolls, canola oil was okay to use.